Say you've got one of these Minolta 7000 cameras. Great camera. Just one problem. Whenever you pick it up the batteries are flat. You've lined up your shot, you press the shutter button, the mirror flips up and nothing happens.

What you need is something a little more reliable than these original battery grips. The piles of dead AAA and AA batteries get a little annoying after a while.


The solution as I see it is having a rechargeable battery with a built in charge controller. This means the camera can constantly sit on power while it is at home. Always 100% charged ready to run a few rolls of film. Luckily the engineers at Minolta made this battery pack design very modular and with quite a simple electrical interface. First order of business is to model the battery holder so that we don't have to destroy an original part.

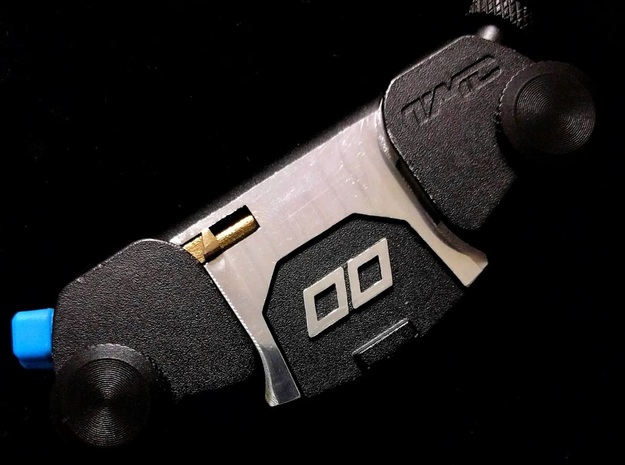
You can note the that this design doesn't have any ports or holes. This was because it was being produced before I had the rest of the components in hand. Speaking of components these are the parts that you need:
- TP4056 based charge controller
- A lithium battery (This one fits easily)
- A couple of 3mm LEDs why not buy 30!
- Some brass rod to make your contacts. Springs would be even better but good luck buying two of those for anything less than $10. I cant justify that to myself somehow.
- And finally some jumper wire for connecting everything up.

Implementation time! It is a really simple setup. Simply solder the battery to the appropriate terminals. Desolder the existing LEDs from the PCB and replace them with the new 3mm ones. I used the jumper wire to make a flexible connection here. Now drill and rasp out the holes in a spot that you like. The top side of the new battery grip makes the most sense because the camera can sit flat while you are charging it and your hands won't come in contact with the ports while you use the camera.
 Here is the result of this build out. I've filled a lot of the grip with Sugru. This fixes the components in place extremely solidly. This is particularly important for the charge controller as it has to stand up to the force of repeated USB connection and disconnection cycles. The Sugru was also used to fill up void space from the imperfect fit of the part. If you want to do this simply brush vegetable oil onto the side of the void you want to fill attach the Sugru to the other part and press both sides together until they mate the way you want them to.
One thing to note is the green pin. I originally missed this part. It is used to separate the memory backup battery inside the camera from the circuit when the battery pack is connected. Forgetting this will cause your battery to attempt to charge this little 3V lithium cell which could go badly. Another option is simply to take the backup cell out since you wont need to detach the new battery grip ever again. Luckily the new grip looks much better on the camera than it looks inside.

One thing to note is the green pin. I originally missed this part. It is used to separate the memory backup battery inside the camera from the circuit when the battery pack is connected. Forgetting this will cause your battery to attempt to charge this little 3V lithium cell which could go badly. Another option is simply to take the backup cell out since you wont need to detach the new battery grip ever again. Luckily the new grip looks much better on the camera than it looks inside.


Of course there were a few lessons learned along the path of this build.
For a start voltage wise the camera will accept 4.1V and nothing lower. Below this point it automatically shuts down when you press the shutter button. This was tested on a beefy bench power supply so it's not the battery that causes this behavior. The camera draws about 1.1 amps during it's shutter actuation and frame winding. This load is for a roughly 200 milliseconds. It then returns to it's quiescent draw which is very low. Oh and before I forget the metering system and the LED backlight for the viewfinder together draw around 300mA when they are on. The AF motor also draws around 1 amp.

Earlier I said the camera only accepts >4.1V with the factory manual suggesting a max voltage of 6V be applied to the camera. So how does it work on a LiPo battery, don't they have a voltage of 3.7V? Well not quite they have a nominal voltage of 3.7V their discharge curve is shown to the right. Luckily for this project it starts at 4.2V. Clearly it drops very quickly to the nominal voltage under discharge. However we are using so little of the battery's capacity this is not an issue in practice.
One thing I learned a particularly hard way about the Minolta 7000 is that they have an internal fuse. The fuse is located inside the hand grip hidden under a film of tape and is formed by a PCB holding a single strand of fuse wire. There is a diode setup to short circuit the battery across this fuse if the polarity is reversed by accident. It's quite a smart setup because in the normal mode of operation you aren't incurring any losses. So if you aren't getting any response from one of these cameras it is a good thing to check before disassembling the entire thing like I did. You can access it by removing a few screws at the bottom of the body and a few inside the front of the grip.